Bond Apatite combines biphasic calcium sulfate with a formula of hydroxyapatite granules in a pre-filled syringe to create a self-setting cement for bone graft procedures. Below we have compiled the most frequently asked questions about the Bond Apatite so you get everything you need to know about Bond Apatite in one place!
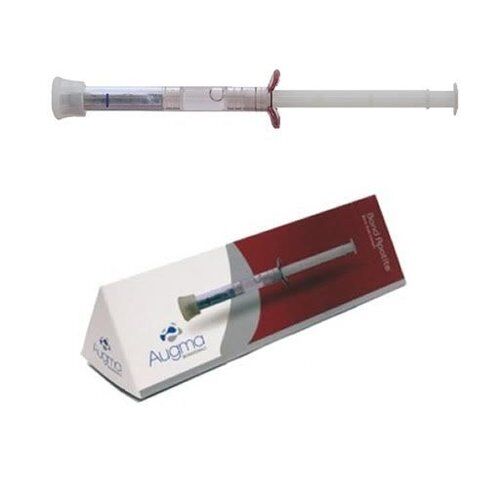
For pricing and purchasing, please visit: Bond Apatite
What is Bond Apatite?
Bond Apatite is a composite graft, made of 3D Bond matrix mixed with HA granules in a controlled particle size distribution, intended to fill or augment a large diversity of osseous defects. It is packaged in pre-filled syringe to create a self-setting cement for bone graft procedures. The syringe is a dual-chamber, prefilled syringe, containing the granulated powder and physiological saline.
How long has Bond Apatite been on the market?
Bond Apatite is primarily Calcium sulfate. Calcium sulfate has been in use for more than 120 year as a grafting material. The patented biphasic calcium sulfate that is the basis of Bond Apatite has been on the market since 2010.
What is the resorption time of Bond Apatite?
Bond Apatite is a composite graft made of biphasic Calcium Sulfate and HA in a specific particle size distribution, in a ratio of 2:1. This combination takes advantage of each part of its components.
Calcium sulfate acts as a short-range space maintainer scaffold. It completely degrades in strict relation to the bone formation rate (4-10 weeks), while the HA acts as a long term space maintainer.
The amount of HA within the graft is a relatively small proportion (33%), and is intended only to slow down the overall resorption of the graft.
The bioactivity and the graft transformation into vital bone are due to the biphasic calcium sulfate, which is 66.6% of the graft.
How is working with Bond Apatite different than with traditional granules or putty?
Firstly, Bond Apatite is not an allograft. It is a synthetic graft (alloplast), made of biphasic calcium sulfate with a formula of hydroxyapatite granules. When activated, Bond Apatite forms a kind of cement that is placed in the defect. The transition to working with cement requires a completely different approach than those we are used to working with when using granules or putty.
In order to achieve the optimal result with Bond Apatite, please remember the following points:
- Unlike granules, cement has a defined working time and a defined hardening time, therefore it is important to prepare the lesion in its entirety before carrying out the augmentation (both in terms of hard and soft tissue preparation).
- The flow of work should be continuous and not exceed the working time.
- The material is activated by pushing the syringes shaft down towards the marked line. It is important to push until you feel maximum resistance (This will activate the cement by wetting it and expelling the excess liquid).
- The material should be ejected from the syringe immediately after its activation and in a continuous action.
- After placing Bond Apatite on the graft site, compress it firmly with a dry gauze pad above it. Do not try to disperse the material or shape it before the first compression (If you would like to shape the material, you can do it after this step using the tool of your choice, and re-compress it again with dry gauze).
- Bond Apatite should be compressed for no more than 3-5 seconds. (Over-compressing will break the cement and prevent it from hardening). Remember: Compressing the material is necessary because it improves the quality of the cement and does not prevent the penetration of blood and cells into the graft.
- Due to the fact that the Bond Apatite absorbs and is replaced by the patient’s own bone within 3 months, in order to maintain the final desired volume, it is important to overfill the graft site with 2-5mm (corresponding to the lesion size).
- X-Ray Evaluation: A radiolucent appearance during the first 3 months is normal, due to the replacement of the matrix with the patient’s own bone.
Always remember that general surgical principles, such as proper site preparation, primary closure, and adequate suturing should be respected when using Bond Apatite.
Do I need to cover Bond Apatite with a membrane, like is recommended for other graft materials? Can I leave Bond Apatite exposed?
Bond Apatite is primarily calcium sulfate, which is a material that can be used and is approved as a barrier membrane. In fact, it is common to layer calcium sulfate over other graft materials instead of having to fit a membrane fragment. This is why when using Bond Apatite, a membrane is not needed in nearly all of the clinical cases, as long as primary soft tissue closure is achieved.
Using a membrane might be recommended in large size defects in which soft tissue stabilization cannot be ensured or in socket preservation procedure when a flap was not reflected and the material is completely exposed to the oral environment.
In such cases, a protection barrier is required above the graft to prevent volume loss. For a barrier you can use a collagen sponge or a membrane that can be left exposed above the graft.
In terms of exposure, 3 mm of incision line opening is acceptable. Leaving the material exposed with a gap of 1-3 mm is not an issue as soft tissue will migrate rapidly over it and will close the gap in a few days. However, in socket grafting procedures or in the case of a site that contains bony walls to protect the graft, more than 3 mm of incision line opening the exposed graft should be protected by a collagen sponge secured above as showed in the protocols.
Are there are any additives, accelerators, or polymers within the biphasic calcium sulfate matrix of Bond Apatite?
No, the cement matrix within Bond Apatite is made of pure calcium sulfate as a biphasic formulation. No additives, polymers, or other chemicals are added, so the chemical structure of calcium sulfate remains unchanged. The ability of the biphasic formulation to be moldable and to harden instantly in the presence of blood or saliva is due to the fact that the particles within the cement are partially crystallized and still maintain the ability to adhere and to set and harden. In this way, the cement is much more stable and has a predictable resorption behavior.
What are the indications for using Bond Apatite?
Bond Apatite can be used in a wide variety of osseous defects, including medium- and large-size defects such as dehiscence, fenestration cases, lateral augmentations (horizontal crest widening), sinus cavities, periodontal bone defects, filling of bony defects pre-implant placement or simultaneously with implant placement, filling a cavity post-cyst removal, ridge augmentations, bone splits, etc.
Can Bond Apatite be used for a Sinus Lift?
Yes, certainly, Bond Apatite can be used in sinus lifts, however, it would need to be placed in increments which make the technique not comfortable to work with. Hence, our recommendation is to fill 2/3 of the sinus cavity with your preferred granular augmentation material, and the final 1/3 with Bond Apatite. It will enrich the graft with calcium ions, and will also close the sinus window with no need for additional membrane placement.
What is the working time with Bond Apatite?
The working time with Bond Apatite starts when the powder is mixed with saline. At this time, the material is moldable and pliable. The best pliability is seen immediately after cement activation. Thus, it is vital to have the site completely prepared before the activation of Bond Apatite®. After the site has been prepared, activate the cement within its smart syringe and eject it into the site. As soon as Bond Apatite® is placed in the site, it should be compressed with a dry gauze pad for 3 seconds, and then the material will harden in situ immediately. The compression should be done by applying finger pressure on the gauze for 3 seconds, followed by an additional few seconds’ compaction with a periosteal elevator on the gauze. Once completed, remove the gauze and continue with soft tissue closure according to the protocols.
Is Bond Apatite compatible with cadaver bone? For example, can a bony defect be partially filled with cadaver bone, and then the Bond Apatite placed on top to lend form and stability?
Yes. Bond Apatite is basically calcium sulfate mixed with some HA. Both of these synthetic materials are routinely used in combination with allografts and you can find such instances in the clinical literature. Since calcium sulfate is approved as a barrier membrane, you can graft with any material of choice and then layer calcium sulfate on top of it. If you are planning on using calcium sulfate on top of a graft, you may want to consider 3D Bond, which is just calcium sulfate.
What protocol do you recommend when using Bond Apatite for socket preservation?
There are several potential situations that you may face when grafting with Bond Apatite for socket preservation, below is a review of the main protocols.
Socket Preservation Protocol without lifting a flap
- No need to raise a flap.
- Extract the tooth and prepare the socket for grafting.
- Eject the cement into the socket.
- Press firmly over the cement for 3 seconds using dry sterile gauze and finger pressure. Do not use an instrument to push and compact the cement into the bottom of the socket. (If the interdental space is too narrow to accommodate direct finger pressure on the sterile gauze, then a mirror handle or similar instrument can be applied on top of the gauze).
- Protect the cement by covering it with a collagen sponge and secure the sponge in place to the surrounding soft tissue by an initial suture thereafter with a cross stitch above. During the initial stage of healing, the cement should not be left exposed .
Socket Preservation Protocol with lifting a flap
- Before Flap reflection perform short mesial oblique vertical incision (up to 2 mm into the mobile mucosa).
- Raise full thickness flap, minimally as needed to expose the entire defect â (Do not perform any manipulation to get tension free flap. No horizontal dissection release cuts, and no brushing. the flap should be with tension during closure and not tension free).
- Extract the tooth and prepare the site for grafting.
- Cement application
- Eject the cement into the site.
- Place dry sterile gauze and press firmly for 3 seconds on the buccal and occlusal aspects.
- Reposition the flap for maximal closure by stretching it directly above the cement (exposure of 2-3 mm is fine, but no more than that).
What is the protocol for Lateral Augmentation / Crest & Ridge Widening with Bond Apatite?
- Raise a flap
- The flap should be minimally reflected in order to expose the entire grafted site (Only one vertical cut should be performed no more than 2-3 mm into the mobile mucosa). Do not perform any horizontal periosteal dissection for release.
- Prepare the site for grafting
- Cement application
- Apply the cement and press firmly for 3 seconds to adapt to the defect using sterile dry gauze.
- If needed, apply an additional layer to obtain the desired volume (slightly overfill).
- Press firmly with the dry sterile gauze for 3 seconds after each layer.
- Press again with a periosteal elevator in order to compact and compress the cement well.
- Flap Closure
- Reposition the flap by stretching it directly above the cement for maximal closure (up to 2-3 mm of graft exposure is fine but not more than that).
- Suture first the mesial corner, then distal, in between, and lastly the vertical aspect.