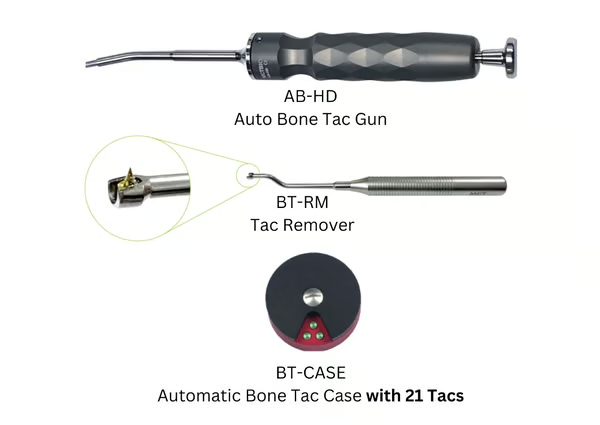
The Automatic Bone Tack kit allows you to effectively secure membranes with the touch of a button. The unique handle drives titanium alloy tacks that stabilize the membrane. Below is an FAQ for Automatic Bone Tack Kit. If you do not see your question answered, please feel free to open a new topic to ask a question. For pricing and purchasing information, please visit our shop at: Automatic Bone Tack Kit with Tack Remover.
Are the tacks in the Automatic Bone Tack Kit compatible with all membranes?
Yes, the tacks can be used to fixate any type of membrane. When you purchase the kit, you have the option of buying a 21 Pack of 3.5mm Short tacks or a 21 pack of 4.5mm Long tacks.
How do you remove the tacks?
This kit comes with a Tac Remover. Please watch the Automatic Bone Tack Kit Instructional Videos to see how to use the Tac Remover. However, you can also use any dental instrument with a thin flat side to remove the tacks. Gently insert the flat instrument in between the head of the tack and bone and wiggle gently to create space between the tack head and the bone. Then grab the tack with a needle holder. Alternatively you can use the forceps to grab the tack and pull it out.
Are the bone tacks removed after healing time?
The bone tacks that come with the kit are made of titanium. So you have two options:
Option 1. Leave them in. Since the tacks are made of titanium, they do not need to be removed if you don’t want to remove them.
OR
Option 2. Remove them per the previous question.
Can I use the Automatic Bone Tack Kit on the lower jaw?
Using bone tacks in the mandible is somewhat different because of the dense cortical bone in the mandible. There are 3 options for placing the tacks in the mandible with the Automatic Bone Tack:
-
Use a piezoelectric bur or drill to make a line (i.e. score the cortical bone) where the tacks are going to be inserted. This will allow for easier penetration of the tacks and also create extra blood supply for your GBR.
-
Fire the automatic bone tack kit pull back device twice instead of only once when inserting into the mandible. To do this, you use the tack pull back to insert the tack into the mandible area the first time (it won’t go completely in because of the bone density). Then you remove the instrument, pull back again, place the automatic bone tack kit on the tack, and fire again to fully insert the tack.
-
Use a standard manual tack holder with a mallet to place or simply push the tack further into the mandible.
What is the cleaning and sterilization procedure for the automatic bone tack kit?

The instructions below pertain to the automatic bone tack holder.
The actual bone tacks are single-use ONLY.
Instrument Cleaning
Please follow these cautionary cleaning instructions: - Do not submerge in any solution - Do not use ultrasonic devices - Do not put in a “washer”
Instead of soaking and washing, since the only thing that touches the patient’s mouth is the tip of the bone tack holder, to clean this instrument, simply gently rinse the OUTSIDE of the holder only to completely remove any foreign materials, and/or blood. Then dry it. After is dry, wipe down the entire instrument with an alcohol wipe, especially the tip and handle. Then let it dry completely, and after it is completely dry, put it in a steam autoclave for sterilization, as per the autoclave instructions below. Manufacturer does not suggest the use of any abrasive brushes or materials to clean.
Instrument Sterilization - Steam Autoclave This kit may be autoclaved. Follow the sterilizer manufacturer’s recommended procedure while observing the following cautions: - 15 Minutes At 273 ̊F / 134 ̊C (15psi) - Use Of Hard Water May Leave Deposits - Do Not Use Closed Containers - Dry at Least 10 Minutes - Do not submerge in any solution - Do not use ultrasonic devices - Do not autoclave for extended periods of time (i.e. overnight) - Extended autoclaving should not be confused with repeated autoclaving. Repeated autoclaving will not harm the product.